
White Chocolate Mousse Cake Filling is the ultimate way to elevate your desserts. This creamy, airy, and indulgent filling adds a luxurious touch to any cake, making it perfect for special occasions or simply treating yourself. In this guide, you’ll learn step-by-step how to make the perfect white chocolate mousse cake filling, along with tips, tricks, and creative variations to customize it for your next masterpiece.
In this article, I’ll guide you through the process of making white chocolate mousse specifically as a cake filling. We’ll go step by step, explore tips for perfecting the mousse, and even dive into creative variations. Plus, I’ll suggest some exciting internal linking opportunities from Delishing Recipes to inspire your dessert-making journey. Let’s turn your cake dreams into reality!
Why White Chocolate Mousse Is Perfect for Cake Fillings
Not all cake fillings are created equal. While some might be too sweet, heavy, or one-dimensional, white chocolate mousse stands out as a truly exceptional option that ticks every box. It brings a unique combination of texture, flavor, and versatility that transforms any cake into a masterpiece. Let’s dive deeper into what makes this filling such a perfect choice for cakes.
1. Light and Airy Texture
One of the most magical aspects of white chocolate mousse is its texture. It’s soft, fluffy, and cloud-like, adding a sense of lightness to every bite of cake. This is especially important when you’re layering a rich cake, like chocolate or red velvet, where the mousse acts as the perfect balance, preventing the dessert from feeling too heavy.
Imagine cutting into a slice of cake, and as your fork glides through the layers, it meets the silky, pillowy mousse. The mousse doesn’t just sit there—it elevates the entire experience, giving you that delightful “melt-in-your-mouth” moment that every great dessert should have.
2. Rich and Creamy Flavor
While it’s light in texture, white chocolate mousse doesn’t compromise on flavor. The buttery sweetness of white chocolate creates a luxurious filling that’s indulgent without being overwhelming. Unlike darker chocolates, which can have bitter notes, white chocolate is mellow and creamy, making it approachable and universally loved.
The flavor works beautifully with a wide range of cake types. For instance, in a simple vanilla sponge, the mousse adds a creamy, decadent layer that enhances the cake’s subtle sweetness. Pair it with a bold chocolate layer, and you’ve got a combination that’s both rich and perfectly balanced.
3. Incredible Versatility
One of the reasons white chocolate mousse is so popular is its versatility. It’s like a blank canvas that you can pair with almost any flavor to suit the cake’s theme or occasion. Here are some flavor combinations that showcase its adaptability:
- Fruity Pairings: The sweet creaminess of the mousse beautifully complements tangy fruits like raspberries, strawberries, or passionfruit. You can add a layer of fresh fruit or drizzle fruit puree between the cake layers for a refreshing contrast.
- Citrus Accents: White chocolate mousse is the ideal partner for citrus flavors like lemon or orange, as its buttery richness balances the zesty tang. Adding a touch of lemon zest to the mousse can brighten up the entire dessert.
- Chocolate Layers: When used in a chocolate cake, white chocolate mousse creates a stunning contrast, adding sweetness and lightness to the dense, cocoa-rich layers.
This versatility allows you to use white chocolate mousse in cakes for any occasion—be it a sophisticated wedding cake, a fruity summer dessert, or a decadent holiday centerpiece.
4. Easily Customizable
Another standout quality of white chocolate mousse is how easy it is to customize. By adding a few simple ingredients, you can completely transform the flavor profile to match your cake or theme. Here are some ways to get creative:
- Fruit Purees: Swirl in raspberry, mango, or strawberry puree to create a fruity mousse with vibrant color and flavor.
- Liqueurs: Add a splash of Baileys, Grand Marnier, or Amaretto for an adult-friendly twist that enhances the richness of the mousse.
- Spices and Zest: Mix in cinnamon, cardamom, or citrus zest for a warm, aromatic layer that pairs beautifully with seasonal cakes.
- Coffee Infusion: Stir in a teaspoon of espresso powder to give your mousse a mocha-inspired flavor—perfect for pairing with chocolate or tiramisu cakes.
Customization means you can make your cake truly one-of-a-kind, tailoring it to the preferences of your guests or the occasion you’re celebrating.
5. Balancing Sweetness and Richness
Many cake fillings can be overly sweet, leaving you with a dessert that feels cloying after a few bites. White chocolate mousse, however, has a balanced sweetness that complements rather than overpowers. The use of heavy cream and egg whites gives it a velvety smoothness that tempers the sugar in the white chocolate.
This balance makes it an excellent filling for multi-layered cakes, where the mousse serves as a bridge between flavors. It adds depth to the cake without making it feel heavy or overly indulgent.
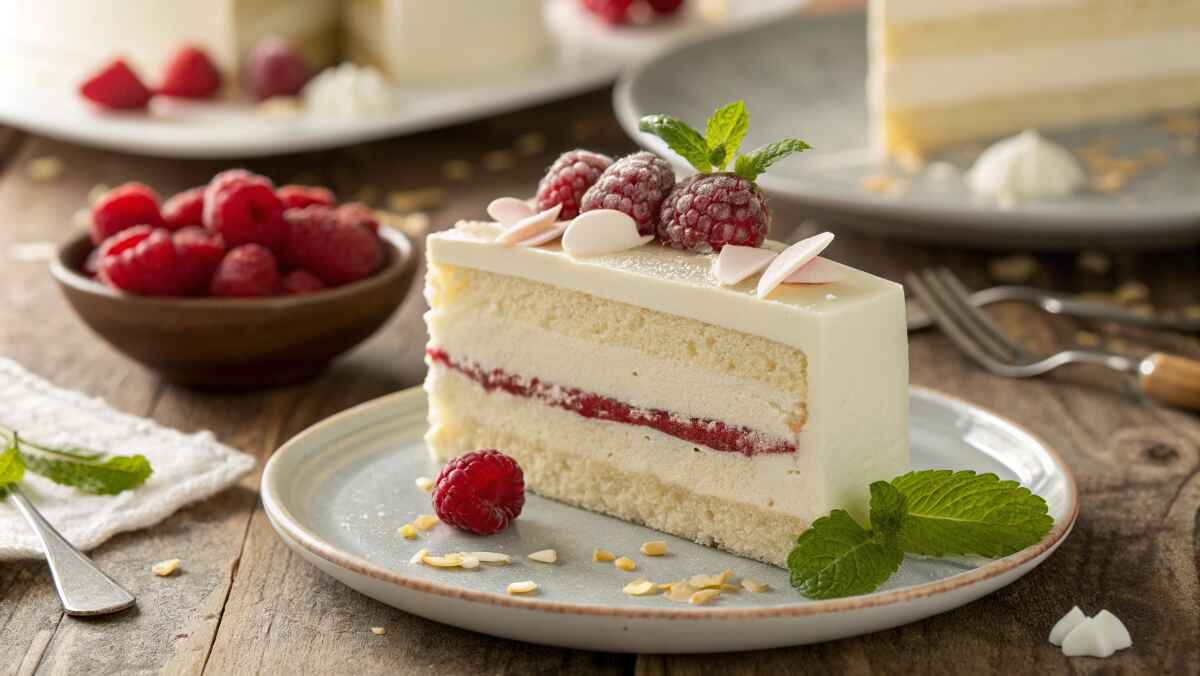
6. A Visual Showstopper
Let’s not forget how visually appealing white chocolate mousse can be in a cake. Its pale, creamy color creates a stunning contrast against darker cake layers, and its smooth texture adds an element of elegance. You can even pipe it between the layers for a clean, professional look.
Want to take it a step further? Layer white chocolate mousse with ideas inspired by this ultimate guide to poke cakes for a dessert that’s as visually stunning as it is deliciously moist.
The Perfect Choice for Any Occasion
Whether you’re baking a birthday cake, a wedding dessert, or simply treating yourself, white chocolate mousse is a filling that elevates any cake. It’s light enough to serve during the summer but rich enough for holiday celebrations, making it a year-round favorite. Its versatility and customizability mean you can create endless flavor combinations, so your cakes will never feel repetitive or boring.
Pair it with chocolate for a bold and decadent dessert, or layer it with citrus and berries for a refreshing twist. No matter the flavor pairing, white chocolate mousse will always deliver on texture, flavor, and elegance.
Essential Ingredients for White Chocolate Mousse Cake Filling
Before we dive into the process, here’s what you’ll need to make enough mousse to fill a standard two-layer 8-inch cake:
For the Mousse:
- 8 oz (225g) white chocolate: Use high-quality chocolate with a high cocoa butter content for the smoothest results.
- 2 cups (480 ml) heavy cream, chilled: This forms the creamy, airy base of the mousse.
- 3 large egg whites: These provide structure and fluffiness.
- 3 tbsp granulated sugar: Adds just the right amount of sweetness and stabilizes the egg whites.
- 1 tsp vanilla extract: A hint of vanilla enhances the overall flavor.
- A pinch of salt: Balances the sweetness and brings out the flavors.
Optional Add-Ins for Customization:
- Fruit Purees: Raspberry, strawberry, or mango puree adds a fruity twist.
- Zest of Citrus: Lemon or orange zest brightens up the flavor.
- Espresso Powder: A small amount of instant espresso powder creates a mocha-inspired mousse.
Step-by-Step Guide to Making White Chocolate Mousse Cake Filling
Step 1: Melt the White Chocolate
Chop the white chocolate into small, uniform pieces for even melting. Place the chocolate in a heatproof bowl over a pot of simmering water (a double boiler) and stir gently until fully melted and smooth. Once melted, remove it from the heat and let it cool to room temperature.
Pro Tip: Be careful not to overheat the chocolate. White chocolate is more delicate than dark chocolate and can seize if exposed to too much heat. If it does seize, add a splash of warm milk to bring it back to a smooth consistency.
For more tips on working with chocolate, check out this churro cheesecake recipe for inspiration on adding textures and flavors to your dessert.
Step 2: Whip the Heavy Cream
Pour the chilled heavy cream into a large mixing bowl. Using an electric mixer, whip the cream on medium speed until it reaches soft peaks. Soft peaks mean the cream holds its shape but still has a slight droop at the tip when you lift the whisk. Once whipped, refrigerate the cream while you prepare the rest of the mousse.
Step 3: Beat the Egg Whites
In a clean, grease-free bowl, whisk the egg whites with a pinch of salt until frothy. Gradually add the granulated sugar, one tablespoon at a time, while continuing to whisk. Beat the egg whites until they form stiff, glossy peaks. These whipped egg whites are what give the mousse its signature lightness and structure.
Why Use Egg Whites? They add a fluffy, airy texture to the mousse, which helps balance the creaminess of the white chocolate.
Step 4: Combine the Ingredients
Now it’s time to bring all the elements together:
- Fold the Chocolate and Cream: Take the cooled melted white chocolate and gently fold it into the whipped cream. Use a spatula and a light hand to preserve the airiness.
- Add the Egg Whites: Next, fold the whipped egg whites into the mixture in batches. Be patient and gentle—this step ensures your mousse stays fluffy and smooth.
Pro Tip: Folding is an art. Use slow, sweeping motions to incorporate the ingredients without deflating the mixture. Imagine you’re tucking everything in for a nap!
Step 5: Chill the Mousse
Transfer the mousse to an airtight container and refrigerate it for at least 2–3 hours. This allows the mousse to firm up and develop its rich, silky texture, making it easy to spread between cake layers.
Step 6: Assemble Your Cake
Once the mousse has chilled, it’s time to assemble your cake:
- Prepare the Cake Layers: Make sure your cake layers are completely cooled before adding the filling. Warm cake can melt the mousse and ruin its texture.
- Spread the Mousse: Use a spatula or piping bag to apply a generous layer of mousse between each cake layer. Be sure to spread it evenly to create a smooth and consistent filling.
- Stack and Chill: Carefully stack the cake layers, then refrigerate the assembled cake for at least 30 minutes. This helps the mousse set and keeps the layers stable.
For extra visual appeal, consider decorating the cake with garnishes inspired by this pecan pie cheesecake recipe.
Creative Variations for White Chocolate Mousse Cake Filling
One of the best things about white chocolate mousse is its versatility. Here are some fun ways to customize your filling:
- Berry Swirl: Fold in a swirl of raspberry or strawberry puree for a fruity burst of flavor and color.
- Citrus Kick: Add orange or lemon zest to brighten the flavor.
- Mocha Magic: Mix in a teaspoon of espresso powder for a subtle coffee note.
- Nutty Crunch: Sprinkle in finely chopped toasted almonds, hazelnuts, or pistachios for added texture.
- Boozy Delight: Add a splash of Grand Marnier or Baileys for a grown-up twist.
FAQs About White Chocolate Mousse Cake Filling
1. Can I Make White Chocolate Mousse Ahead of Time?
Yes! White chocolate mousse can be made up to 2 days in advance. Store it in an airtight container in the fridge, and give it a quick stir before using it as a cake filling.
2. How Do I Keep the Mousse Stable in a Cake?
For extra stability, you can add 1 teaspoon of unflavored gelatin dissolved in warm water to the mousse during the folding step. This helps it hold its shape in multi-layered cakes.
3. Can I Freeze a Cake with White Chocolate Mousse Filling?
Absolutely. Once assembled, wrap the cake tightly in plastic wrap and store it in the freezer for up to a month. Thaw in the fridge before serving.
Final Thoughts
White chocolate mousse cake filling is a showstopper that transforms any cake into a luxurious dessert. Its creamy texture, light consistency, and customizable flavor make it an essential recipe for bakers of all skill levels. Whether paired with chocolate, vanilla, or fruit-infused cakes, this filling is guaranteed to elevate your dessert game.
For more ideas and inspiration, explore Delishing Recipes to discover complementary recipes, tips, and techniques to make your cakes truly unforgettable. Let’s get baking!