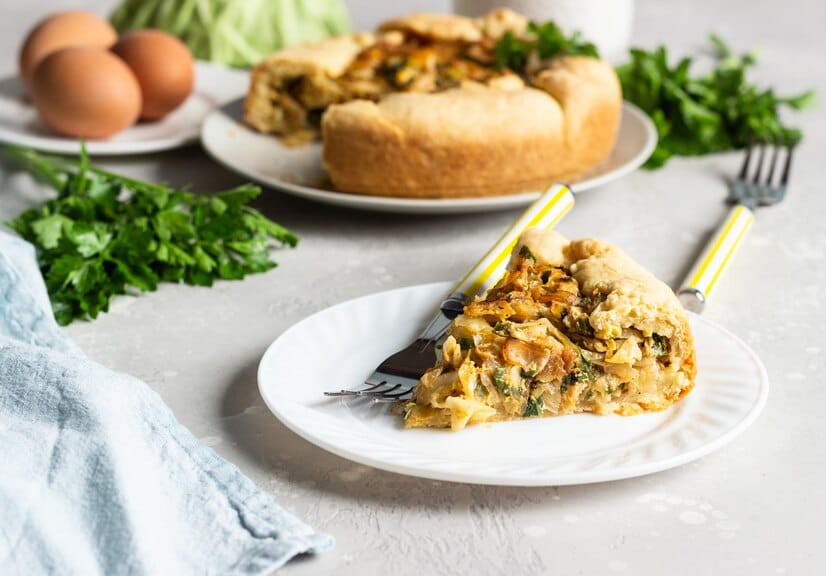
A flaky, golden crust is essential for a classic quiche, and Bisquick makes it easier than ever to achieve perfection. Forget the labor-intensive process of rolling, chilling, and blind-baking dough—Bisquick simplifies the steps while delivering a buttery, light, and crispy crust that pairs beautifully with savory fillings. Whether you’re hosting a brunch, preparing a quick dinner, or meal-prepping for the week, this guide will show you how to make the perfect quiche crust with Bisquick, along with variations, expert tips, and answers to common questions.
Why Choose Bisquick for Your Quiche Crust?
Bisquick is the ultimate time-saver when it comes to making quiche crusts. Traditional crusts require meticulous preparation, but Bisquick simplifies the process while maintaining a delicious, golden crust. Here’s a closer look at the many reasons why Bisquick is the ideal choice for creating a quiche crust:
1. Saves Time
One of the biggest advantages of using Bisquick is the time you save. Traditional pie crusts require multiple steps:
- Rolling out the dough
- Carefully fitting it into the dish
- Pre-baking to avoid sogginess With Bisquick, you skip all of that! The press-in method is quick and hassle-free—simply mix the dough, press it into the dish, and you’re ready to add your filling.
This makes Bisquick especially appealing for busy mornings, last-minute brunches, or weeknight dinners when you don’t have the luxury of time.
2. Perfect Results Every Time
Thanks to Bisquick’s self-rising formula, your quiche crust will bake evenly with a light, golden finish. The mix contains a balanced blend of flour, fat, and leavening agents, which means the crust forms a delicate, crisp layer that complements the creamy quiche filling perfectly.
No Guesswork: You don’t need to worry about the dough being too dry, too wet, or unevenly baked. Bisquick ensures consistent results, even if you’re making it for the first time.
3. Versatility for Flavor Combinations
Bisquick quiche crust is incredibly versatile, making it a great match for a wide variety of quiche flavors. Whether you’re creating a classic quiche Lorraine, a veggie-packed quiche, or a gluten-free option, Bisquick adapts effortlessly.
Here’s how Bisquick shines across different styles:
- Classic Combinations: Think bacon and cheese, ham and Swiss, or spinach and feta.
- Vegetarian Options: Perfect with mushrooms, bell peppers, onions, and zucchini.
- Dietary Adaptations: Use gluten-free Bisquick or add herbs and spices to suit your preferences.
- Sweet Crust: Add sugar for dessert quiches or tarts.
Bisquick’s neutral flavor profile allows you to customize the crust to complement any filling.
4. Ease of Use
Even for kitchen novices, Bisquick is a foolproof choice. Traditional pie crusts often require:
- Precise measurements and techniques.
- Refrigeration to ensure the dough stays workable.
- Skillful rolling to avoid tears or unevenness.
Bisquick eliminates these challenges entirely. With just a bowl, a fork, and a pie dish, you can prepare a quiche crust in minutes. There’s no need for specialized equipment or advanced techniques, making it an excellent option for beginners or those who want a reliable recipe.
5. No Special Ingredients Required
Bisquick is a pantry staple in many households, which means you likely already have what you need to make the crust. The additional ingredients—like butter, water, or milk—are also common, ensuring you can whip up a quiche crust anytime without a trip to the store.
6. Customizable for Every Taste
Bisquick crust doesn’t just save time—it’s also highly adaptable. You can enhance the flavor with add-ins to suit your filling or occasion:
- Herbs: Add dried thyme, parsley, or basil for a savory crust.
- Cheese: Incorporate Parmesan or cheddar into the dough for extra richness.
- Spices: A pinch of garlic powder, smoked paprika, or nutmeg can elevate the flavor profile.
7. Beginner-Friendly
For anyone intimidated by making pie crusts from scratch, Bisquick provides a simple and reliable alternative. The dough is easy to handle, and the press-in method eliminates common mistakes like overworking the dough or rolling it too thin. Even if it’s your first attempt at quiche, Bisquick sets you up for success.
8. Perfect for All Occasions
Whether you’re preparing breakfast, brunch, or dinner, Bisquick crust suits any occasion:
- Quick Breakfasts: A light, fluffy crust pairs wonderfully with eggs and cheese for a morning meal.
- Elegant Brunches: Impress guests with a quiche Lorraine featuring a golden Bisquick crust.
- Family Dinners: Pair a hearty, veggie-filled quiche with a salad for a wholesome dinner.
- Meal Prep: Bisquick crust holds up well in the fridge or freezer, making it ideal for make-ahead meals.
A Recipe for Simplicity and Flavor
Choosing Bisquick for your quiche crust allows you to focus on creativity and flavor rather than complicated techniques. It’s the perfect solution for busy cooks and anyone looking for a balance between convenience and quality. Whether you’re a seasoned chef or a beginner in the kitchen, Bisquick ensures you’ll deliver a quiche with a perfectly golden, flavorful crust every time.
Ingredients for a Bisquick Quiche Crust
The best part about Bisquick quiche crust is how few ingredients it requires:
- 1 cup Bisquick baking mix: The base ingredient for the crust.
- 2–3 tablespoons cold water: Helps bind the dough together.
- 2 tablespoons unsalted butter or shortening: Adds richness and flakiness.
- Optional Add-Ins:
- A pinch of salt for enhanced flavor.
- Seasonings like garlic powder, onion powder, or dried herbs (e.g., thyme or rosemary) to complement your filling.
For a richer crust, you can also replace water with milk or buttermilk.
Step-by-Step Instructions for Making Bisquick Quiche Crust
1. Preheat Your Oven
Set your oven to 375°F (190°C). This ensures it’s ready once your crust is prepared.
2. Mix the Dough
- In a medium mixing bowl, combine 1 cup of Bisquick baking mix and 2 tablespoons of cold butter or shortening.
- Use a pastry cutter or fork to blend the butter into the mix until it resembles coarse crumbs.
- Gradually add 2–3 tablespoons of cold water (or milk), stirring gently until the dough forms a soft ball. Be careful not to overmix, as this can make the crust tough.
Pro Tip: If you want to infuse extra flavor, mix in ½ teaspoon of dried herbs or spices.
3. Press the Dough into the Pie Dish
- Lightly grease a 9-inch pie dish with butter or non-stick spray.
- Place the dough in the center of the dish and use your fingers to press it evenly across the bottom and up the sides. Ensure the thickness is consistent to avoid uneven baking.
4. Pre-Bake the Crust (Optional)
For a sturdier and crispier crust, pre-bake it before adding the filling:
- Poke a few holes in the bottom with a fork to prevent bubbling.
- Bake for 8–10 minutes, or until lightly golden.
- Allow the crust to cool slightly before pouring in the filling.
5. Add Your Quiche Filling and Bake
Once your crust is ready, pour in your prepared quiche filling and bake according to your recipe. A typical quiche bakes at 375°F (190°C) for 30–40 minutes, or until the center is set.
Creative Variations for Bisquick Quiche Crust
1. Gluten-Free Quiche Crust
- Substitute Bisquick with a gluten-free baking mix to make the crust suitable for those with gluten sensitivities.
- Ensure any additional fillings are also gluten-free.
2. Herb-Infused Crust
- Add 1 teaspoon of dried herbs like thyme, rosemary, or Italian seasoning to the Bisquick mix.
- Pair with fillings like spinach, feta, and sun-dried tomatoes for a Mediterranean-inspired quiche.
3. Cheese-Enriched Crust
- Mix ¼ cup of grated Parmesan or cheddar cheese into the dough before adding water.
- This creates a rich, cheesy crust that enhances savory fillings.
4. Sweet Quiche Crust
For dessert quiches or tarts:
- Add 1–2 tablespoons of sugar to the Bisquick mix.
- Use fillings like custard, fruit, or chocolate for a sweet treat.
Tips for Perfecting Your Bisquick Quiche Crust
- Keep It Cold: Use cold butter or shortening and work quickly to keep the dough chilled, which helps create a flaky texture.
- Don’t Overmix: Overworking the dough can result in a tough crust. Mix just until the ingredients come together.
- Pre-Bake for Wet Fillings: If your quiche includes watery vegetables like zucchini or spinach, pre-baking the crust prevents sogginess.
- Customize the Flavor: Experiment with seasonings and add-ins to match the flavors of your quiche filling.
Serving Suggestions
Bisquick quiche pairs well with:
- A Fresh Salad: A light side salad with vinaigrette complements the richness of the quiche.
- Roasted Vegetables: Serve alongside roasted asparagus or Brussels sprouts for a balanced meal.
- Bread or Pastries: Add a warm baguette or flaky croissants for a brunch spread.
FAQs About Bisquick Quiche Crust
1. Can I Make the Crust Ahead of Time?
Yes! Prepare the dough and press it into the dish, then refrigerate for up to 24 hours. Pre-bake when ready to use.
2. How Do I Store Leftover Quiche?
Refrigerate leftover quiche in an airtight container for up to 3 days. Reheat slices in the oven or microwave.
3. Can I Freeze Bisquick Quiche Crust?
Absolutely! Press the dough into the pie dish, wrap tightly in plastic wrap and aluminum foil, and freeze for up to 2 months. Thaw overnight in the refrigerator before baking.
4. Can I Use Bisquick for a Sweet Crust?
Yes, simply add sugar to the mix and pair it with sweet fillings like custards, fruits, or chocolate.
Making a quiche crust with Bisquick is a simple and reliable way to elevate your cooking without the hassle of traditional pie dough. From breakfast to brunch to dinner, Bisquick crusts deliver a golden, flaky texture that complements a variety of fillings. Whether you’re creating a classic quiche Lorraine or experimenting with sweet and savory flavors, this easy-to-make crust will quickly become a go-to recipe in your kitchen.


